If you’re like me, then you’ve probably spent a lot of time in high school class daydreaming and doodling a thousand perfect cartoon waves on your notebook.
It’s safe to say that ninety percent of us surfers have a habit of scribbling perfect waves whenever a pencil is in our hands.
Hopefully the following pointers will help you change your throw-away wave doodles into actual compelling artwork that you want to keep forever.
Drawing a Basic Wave
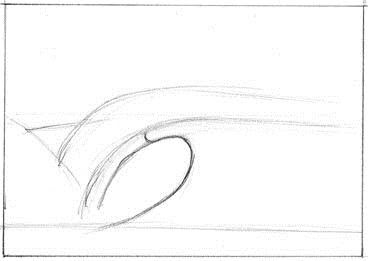
• Step 1. Sketch in the basic shape of the curl, spray, foam and base of the wave.
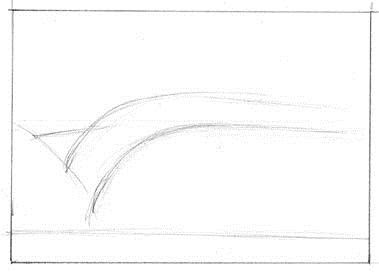 • Step 2
. Add an extra line running parallel and below the curl line to define the thickness of the lip.
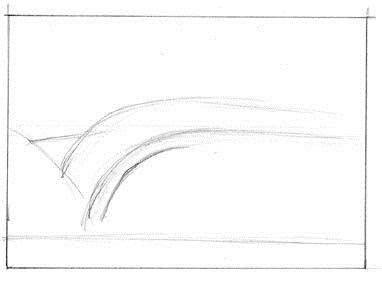 • Step 3.
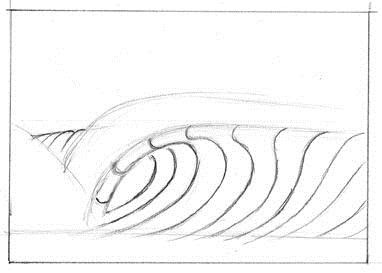
 Add a flow line starting at the lip and curve it around to suggest roundness of the liquid lip. Continue that same flow line around with a half oval down to the base of the wave to show the concave curve of the wave face.
 • Step 4.
 Add the rest of the flow lines. Gradually make each flow line less steep as you move away from the curl, to show the tapered shoulder. Continue the flow lines into the tube to show hollowness.
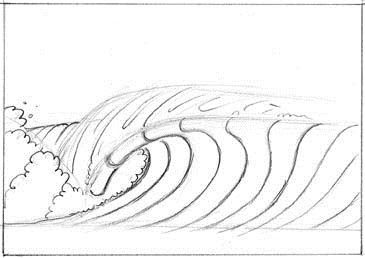
• Step 5. Add simplified spray with thin wispy lines. Add the foam explosion with a series of explosion lines getting bigger as they moving away. Maybe add a foam ball in the tube. Round off the foam at the base of the wave so it won’t look flat.
 • Step 6.
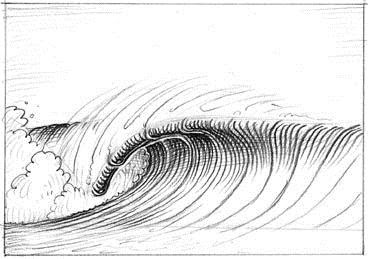
 Add shading on the wave face with smaller contour lines. Gradually make the lines darker as you get further into the tube. Use crosshatching to add more depth. Lightly shade foam and base of the wave. Maybe shade the sky a little, too.
 • Tip:
 Don’t get caught up trying to draw every foam bubble, you’ll go nuts.
• Tip: Using a sharp eraser, keep a defined white line under the lip so it looks separate from the wave face.
• Tip: Add white highlights on the lip with your eraser to give it sparkle.
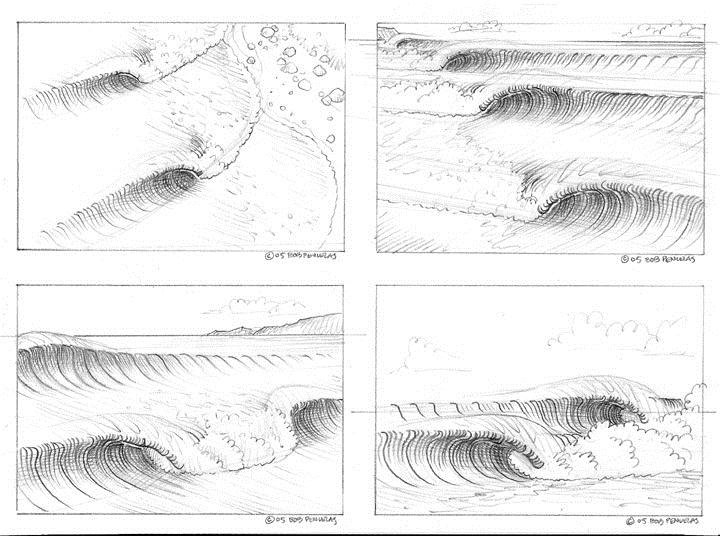
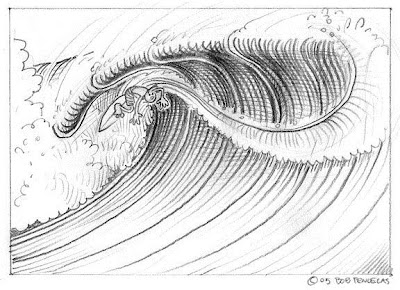
The Importance of PerspectiveDrawing a basic wave can be fun, but after a while it can get boring if you are merely following the same formula over and over again. The key to breaking out of this potential rut is achieved by drawing waves from different angles. There is only one way to successfully create a variety of angles and that is by using the basic principles of perspective. The two basic ingredients in perspective are the horizon line (your eye level) and the imaginary vanishing points. By merely changing the position of these ingredients in your image you’ll be amazed at the variety of waves you can create. (sketches 07 & 08)
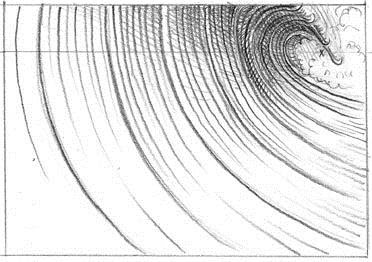
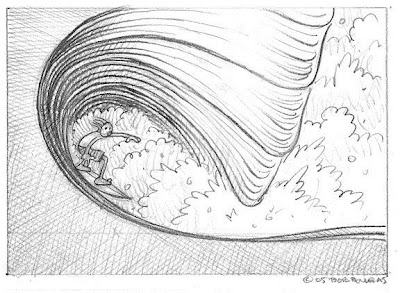
 • View into the tube.
 Additional variations can be achieved just by moving the horizon line high or low and by moving the vanishing point right or left. Give it a try, experiment. (sketches 09 & 10)
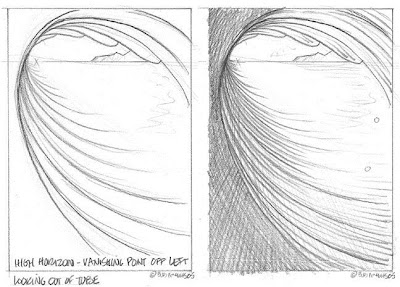
 • View out of the tube.
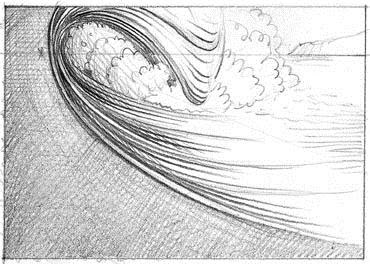
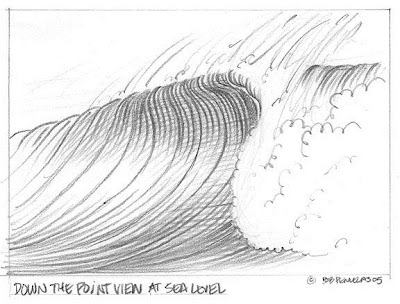
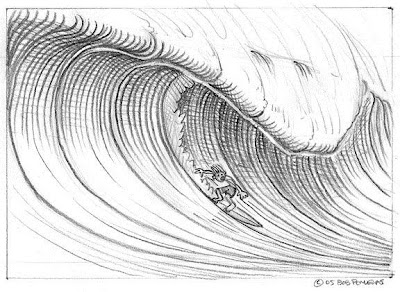
 A high horizon line and one vanishing point on the left and it’s as if your face is against the tube face and you’re racing for daylight. (sketch 11)
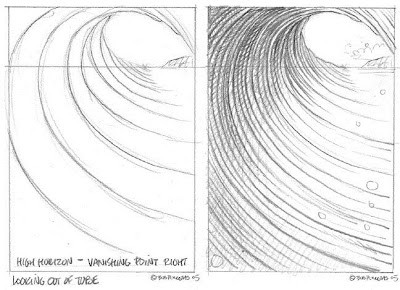
Move the vanishing point to the right and more of the face becomes visible. (sketch 12)
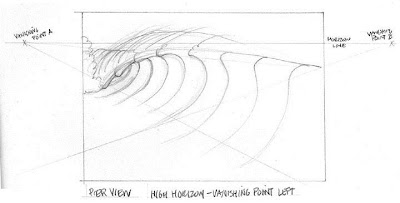
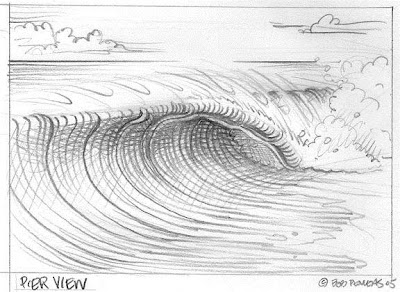
 • View from a pier
. A high horizon line with two vanishing points off to the right and left and it appears as though you’re viewing the wave from a pier and you’re looking down on the wave. (sketch 13)
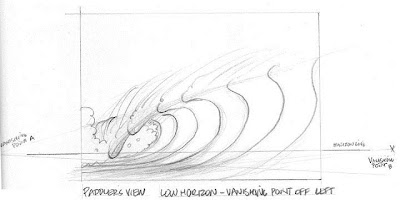
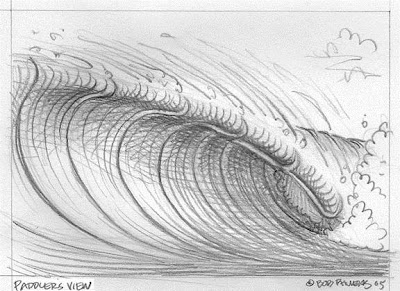
 • Paddler’s eye view.
 This view is accomplished by placing the horizon line extremely low. Both vanishing points are located outside of the image border, one to the left and one to the right. (sketch 14)
 • Bird’s eye view
 This view is accomplished by moving the horizon line up and completely off the image. The two vanishing points are positioned way out to the right and left. (sketch 15)
 • Other views
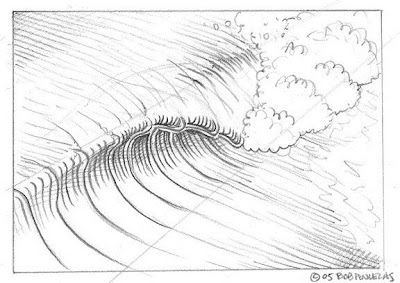
. A view looking down the point can also be achieved by moving these ingredients around. (sketch 16)
 Various Scenes
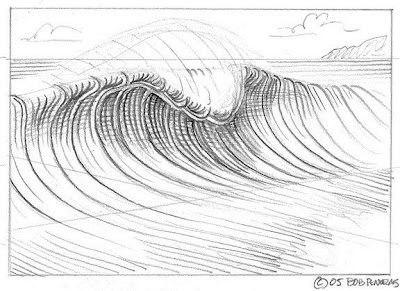
With perspective you can now create line-up scenes, with multiple waves. It could be a reef pass, a beach break or a point break Add land in the background or in the foreground to give the scene some depth. (sketch 17)
 Different Types of Waves
•
Peaks. Tip: Avoid drawing a peak by merely attaching two mirror image waves together. The right and the left are the same yet they are drawn differently. (sketch 18)
•
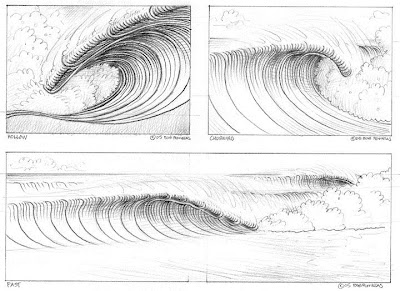
Variations. Don’t forget about hollow waves, freight-trains, slow churning or paper-thin waves. The possibilities are endless. (sketch 19)
 Add Surfers
Don’t forget to add surfers to your waves, whether you draw them regular or goofy foot, backside or frontside and you soon realize that there are endless combinations. (sketches 20,21 & 22)
Remember, there are millions of ways to draw a wave and hopefully with these simple pointers you’ll find million more. So, have fun.


 Mundane things but Ding a Ling